Related Blogs

Overview
With SharePoint Framework (SPFx) development, SharePoint developers build and deploy modern SharePoint Web Parts for Office 365 tenants. SharePoint Framework development helps us fulfill the custom requirements, which can be limited by OOTB features in SharePoint Online. With SPFx, we can create custom Web Parts, Extensions, and Library components.
With SPFx Extensions, the SharePoint end-user experience is extended in the modern document libraries and pages. It helps SharePoint developers to modify the site and build a beautiful design. Also, the notification areas, list data views, and toolbars can be customized with the SPFx extensions. Three types of extensions are included in the SharePoint Framework.
- Application Customizer
- Field Customizer
- List-view Command Set
In this blog, our SharePoint Developers are going to explore in-depth details about the Field Customizer.
Field Customizer
Field Customizers are useful to provide a view for a column. One can provide the custom look and feel for a column in a list. The customization is carried out in the page DOM elements. We all know that this same behavior can also be achieved by Column Formatting. Still, apart from the custom look and feel, Field Customizer allows SharePoint developers to inject JavaScript and jQuery using which one can achieve JS events as well. This is what makes it different from Column Formatting.
Field Customizers can be used in two ways.
- It creates a new site column and applies custom formatting to it.
- It can be attached to the existing list column and don’t add a custom field on the site.
We are going to create a Field Customizer with a new site column being created. Let’s look in detail at how to create a Field Customizer Extension step by step.
Create a Field Customizer Extension Project
- Create a project directory where the project is required to be created. Run Windows PowerShell and navigate to the drive where to create the project directory. Run the following command to create the project directory.
- md field-extension
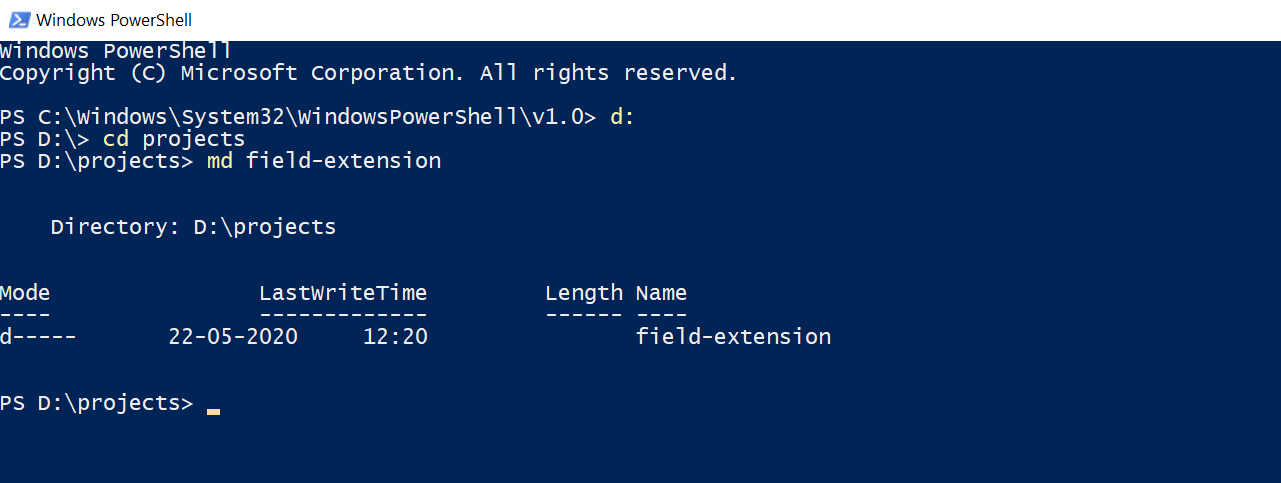
- md field-extension
- Move to this project directory using the below command.
- cd field-extension

- cd field-extension
- For creating a new SPFx solution, execute the below yeoman command.
- yo @microsoft/sharepoint
- It will prompt for details regarding the project. Provide the information and move forward.
- Solution Name – This will be the name of the solution of the field customizer extension.
- Baseline Target – Select SharePoint Online only (latest)
- Place for files – Select the current folder
- Select No (N) to require tenant admin for installing the extension on each site and press Enter. Elements.xml feature deployment file will not be generated through scaffolding if Yes (y) is chosen.
- Type of client-side component – Select Extension.
- Type of client-side extension – Select Field Customizer
- Field Customizer name – This will be the name for a field customizer extension
- Field Customizer description – Provide the appropriate description for the field customizer extension
- Framework – Field customizers can be developed using either ‘No JavaScript framework’ or React. In this blog, No JavaScript framework is used to create an SPFx extension.
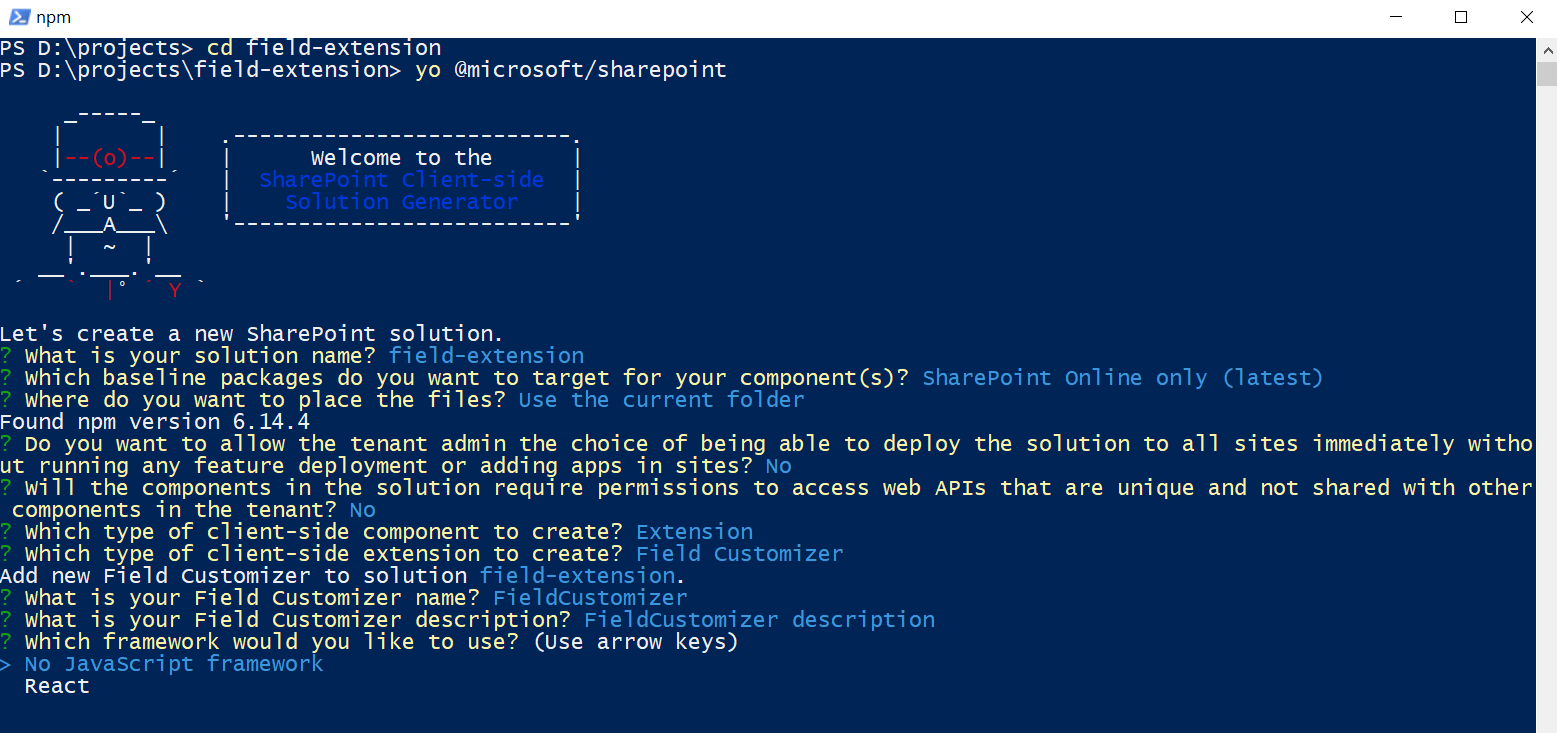
- Once the enter key is pressed, all the needed dependencies will be installed by the yeoman. Along with the field-customizer extension, the solution files will be scaffolded by the yeoman. This may take a while.
- Once the yeoman finishes its process, it will prompt the successful scaffold message.
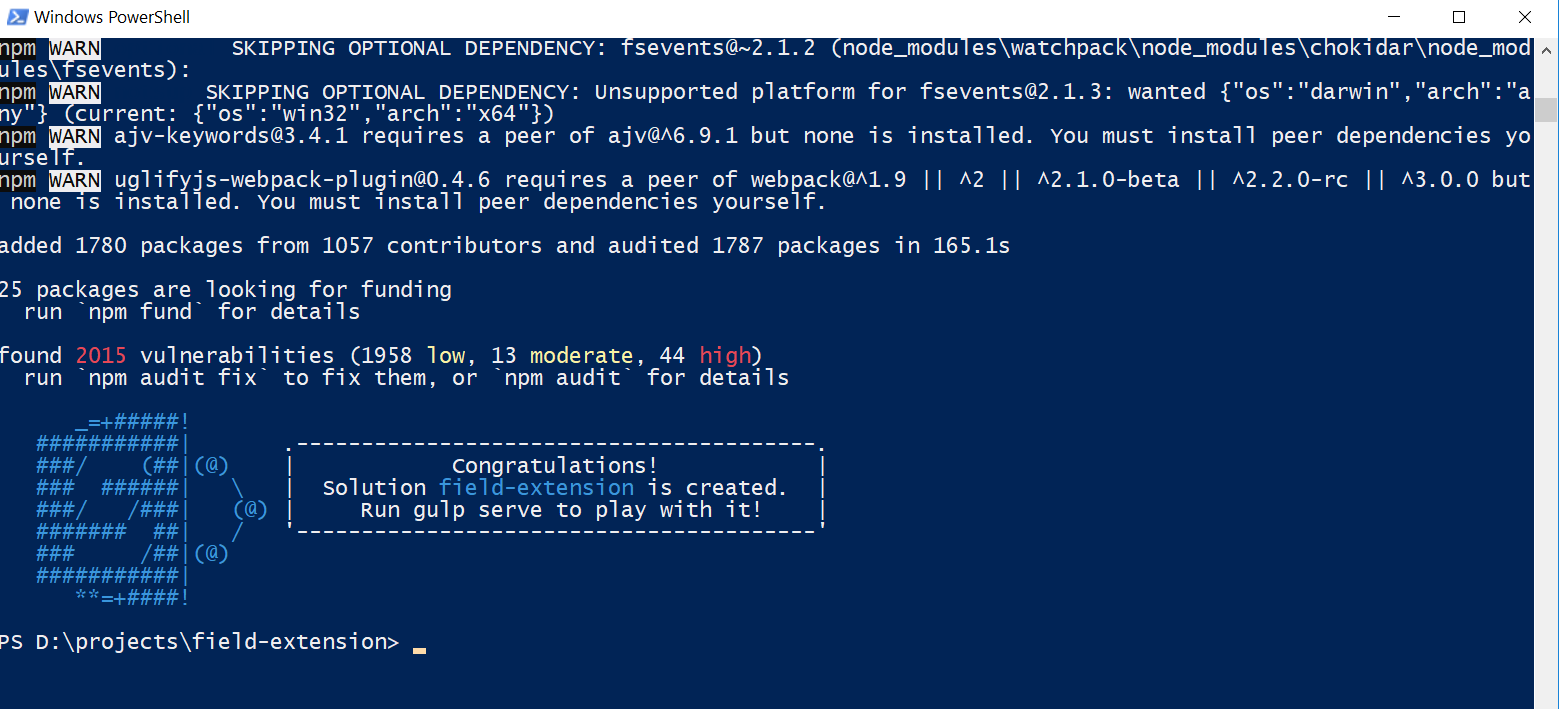 Now check the project directory, the solution files are created. To open the folder in Visual Studio Code, run the below command.
 - code .

- The entire solution will be opened in the visual studio code. The default solution structure is created. Elements.xml file contains the details of the column that is going to be used as a custom field. All the custom code for the extension can be written in the FieldCustomizerFieldCustomizer.ts file.
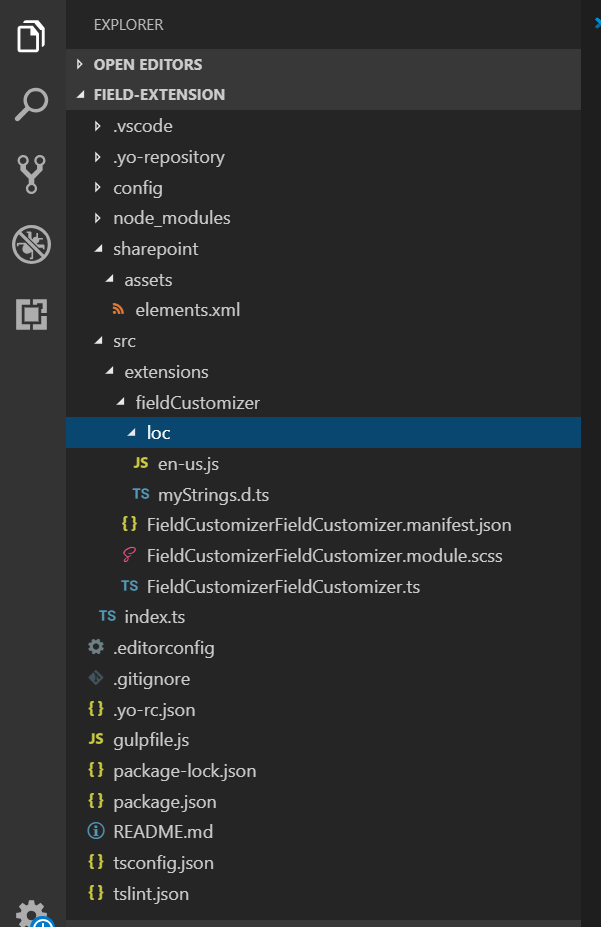
- Open the FieldCustomizerFieldCustomizer.manifest.json file, which is located under src → extensions → fieldCustomizer.
- This file contains details regarding the extension and its unique id.

- The project setup has now been finished. Let’s have a look at the code and try running the extension.
- The code resides in the FieldCustomizerFieldCustomizer.ts file, which is located at src → extensions → fieldCustomizer. Open the FieldCustomizerFieldCustomizer.ts file.
- From the sp-listview-extensibility base package, BaseFieldCustomizer class is imported.

- The code file mainly contains three methods.
- onInit()
- onRenderCell()
- onDisposeCell()
- onInit(): This method is called first as soon as the extension is loaded. All the code that needs to be executed above the rest should be added here. When the solution is created, the default code will be present in this method to write the logs. As with the SPFx Web part’s onInit method, this method also returns a promise to handle asynchronous calls, and the rest of the methods only be called once this promise is resolved. If there is no custom logic for that, just return Promise<void>.

- onRenderCell(): This method is called whenever a field cell is rendered. This method provides a DOM element as event.domElement. All the custom HTML designs can be added to this domElement, and it will be displayed in the cell of that field. By default, the below code will be seen in this method.

- onDisposeCell(): This method frees up the resources that were allocated in DOM during rendering. Mostly used in extensions that are created in the react framework to free up the react elements.
Debug the Extension
As it is known that one cannot debug the SPFx Extensions on the local workbench. To debug the extensions, it is required to specify the landing URL in the serve.json file. SharePoint developers can follow the below steps to debug the field customizer.
- Open the serve.json file, which resides under the config folder.
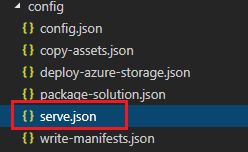
- The serve.json file contains the default settings for the project. In this file, specify the debugging related settings, and provide the port to be used for debugging, default settings and specify other nodes of project settings.
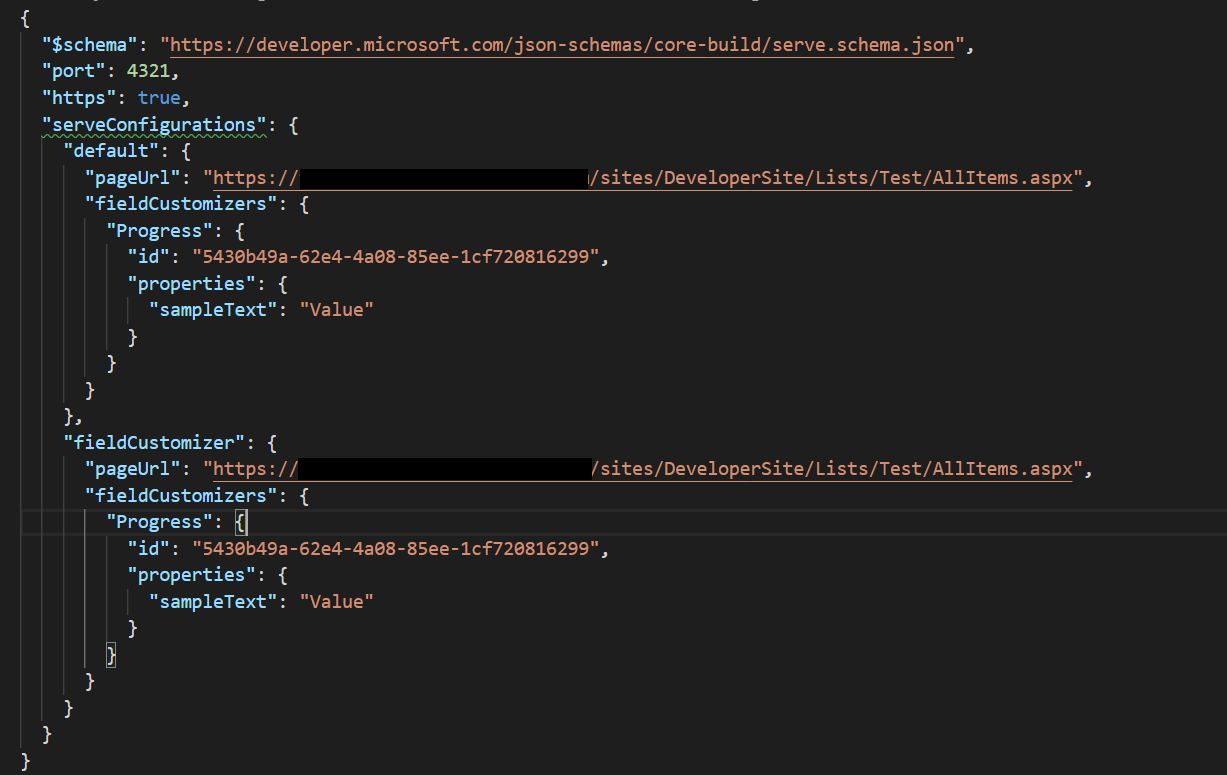
- In serve configurations, there is a “default” node, which is used to provide the List URL “AllItems.aspx” page where the created field customizer is required to debug.
- pageUrl – In this field, provide the List URL.
- e.g. https://domain-name/sites/DeveloperSite/Lists/Test/AllItems.aspx
- InternalFieldName – In this field, provide the internal name of the column in which the field customizer is needed to add.

- pageUrl – In this field, provide the List URL.
- Create a custom list named “Test” on the site, and it has one number column called “Progress.” Let’s insert some entries into it.
- Now as per the above instruction, modify the serve.json file. The below image shows the updated serve.json file.
- Open the console and make sure that the same directory of the project is there. Now, run the below command.
- gulp trust-dev-cert
- The above command will install a developer certificate in the environment. If this command is already executed, then skip this step.
- Run the below command, which will compile the code. Once the compilation is done, it loads the required manifest files from the https://localhost:4321 and loads it into the browser with the required query parameters.
- gulp serve
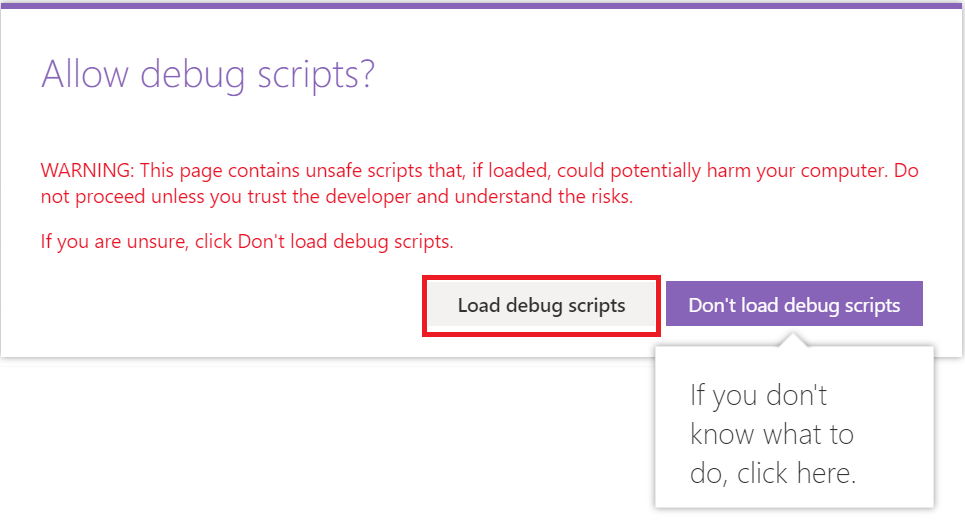
- If the code is compiled without any errors, it will open the URL provided in the serve.json file in the browser. On the browser page, it will prompt to allow debug scripts. Click on “Load debug scripts” to load the scripts on the page.
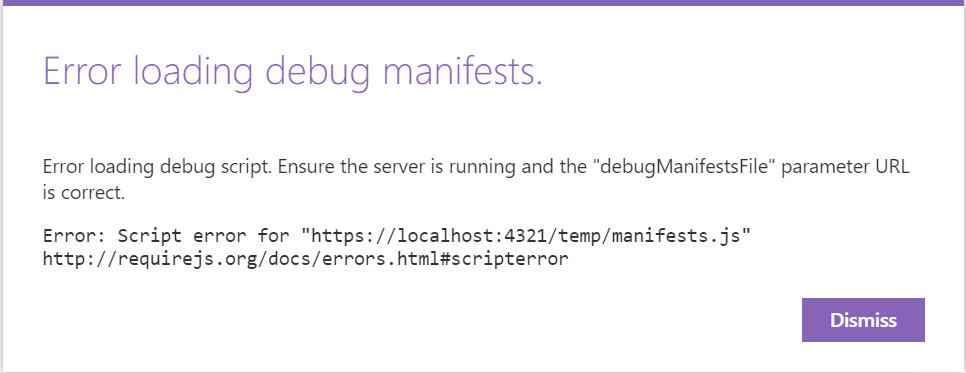
- If it shows the below error, please stop the compilation by pressing ctrl + c in the console. Install the dev-certificate from the console and run the below command to recompile the code.
- gulp serve –nobrowser
- gulp serve –nobrowser
- Once the scripts are loaded successfully, then it is noted that the values in the column have been changed. Here, the default code which was generated within the solution is executed.
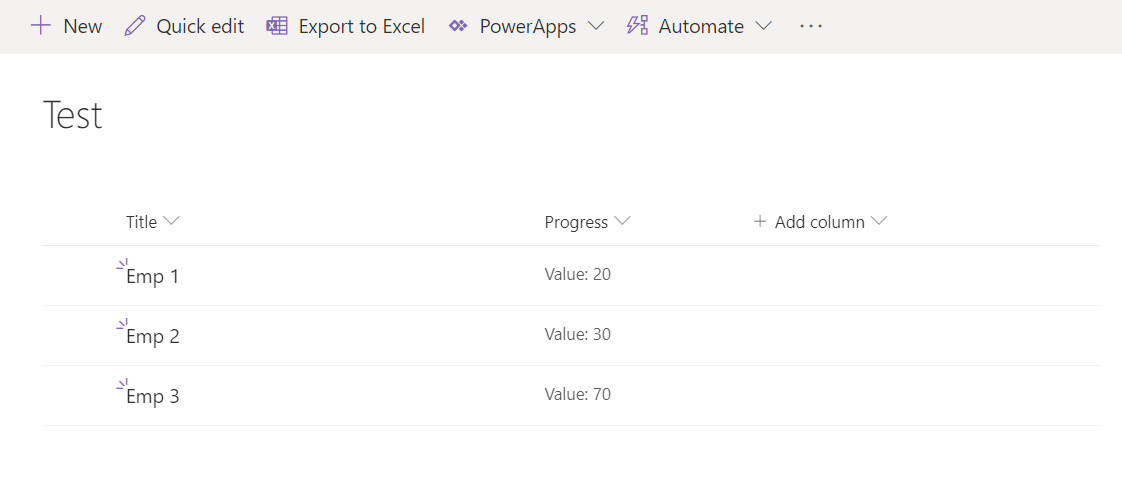
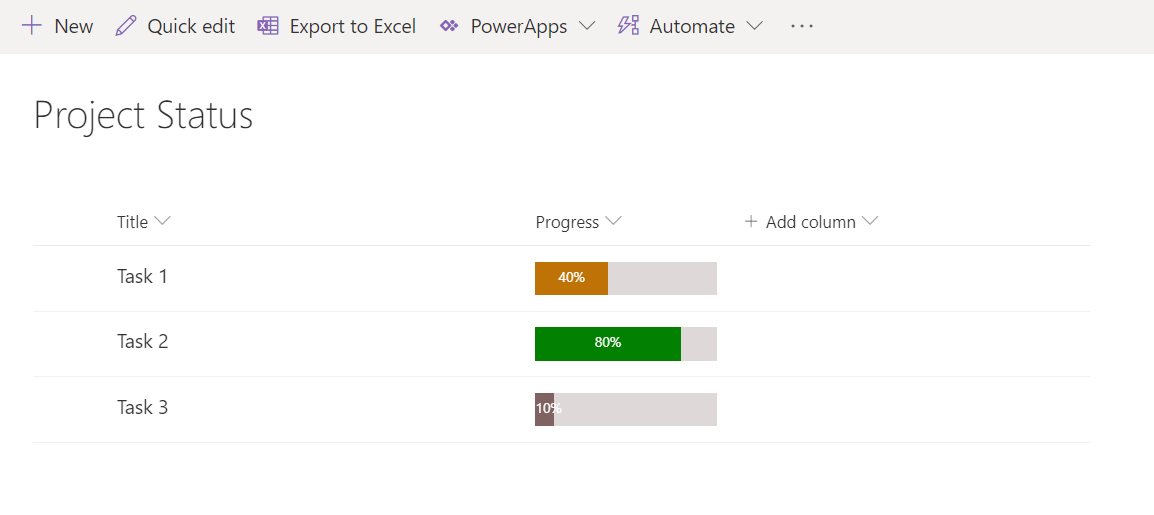
- Once the above output is generated for the list, then replace the default solution code with the custom code as per the requirement. The below code shows the progress bar in three different colors based on the values in the column instead of simple values.
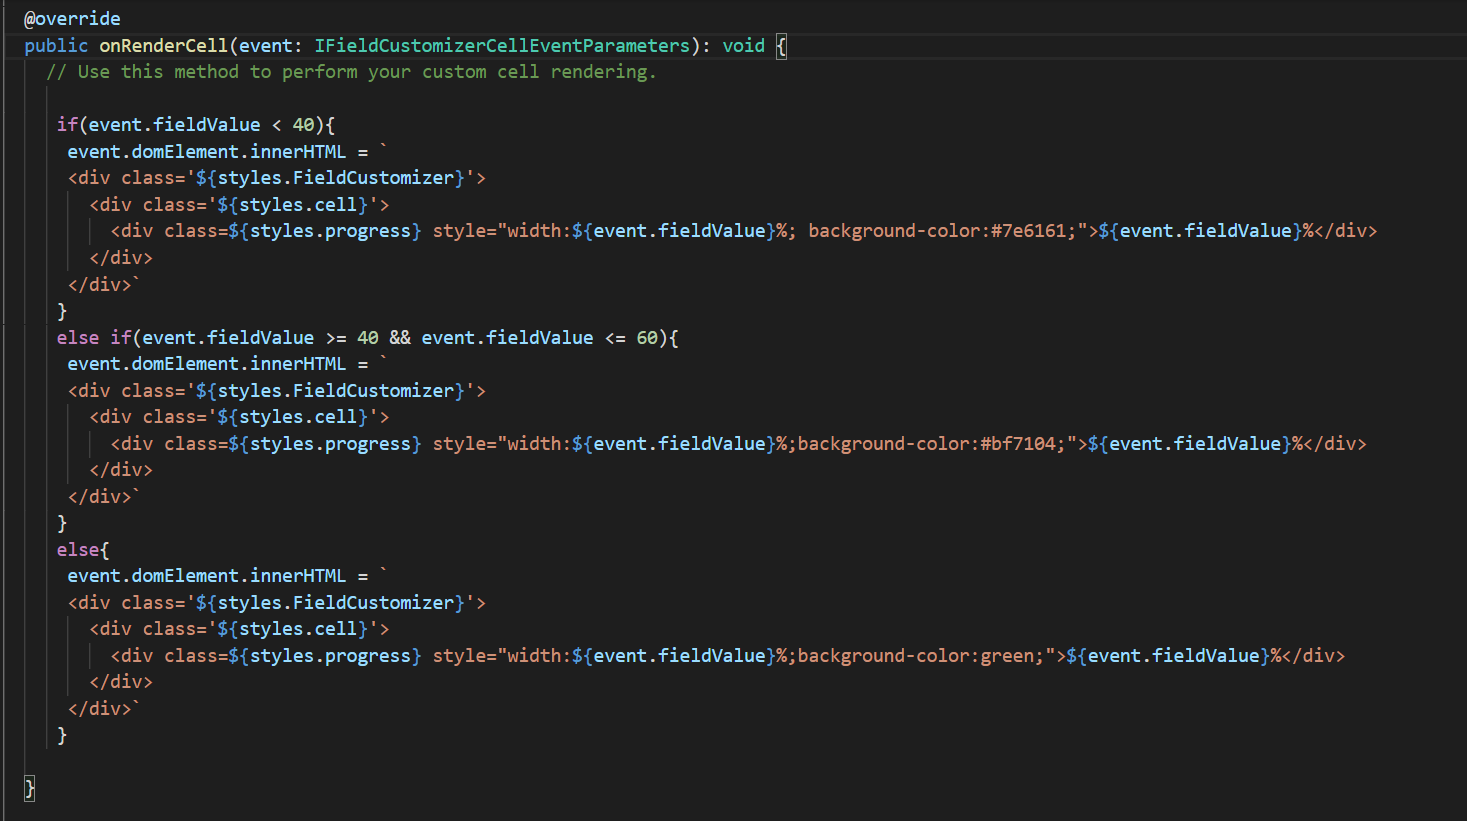
FieldCustomizerFieldCustomizer.ts
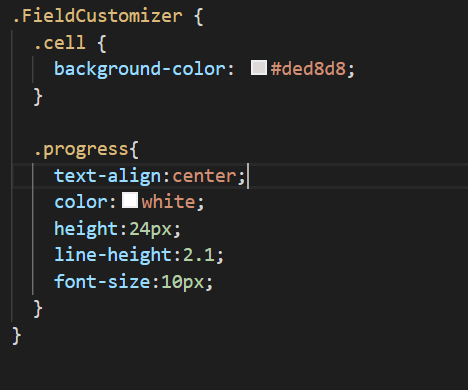
FieldCustomizerFieldCustomizer.module.scss - The above code will generate the following output in the List.

- That’s it. Now a Field Customizer extension is created successfully. Let’s see the steps to deploy this extension on the site.
Deploy the Extension
- To deploy the app on the site, prepare the app’s package, and specify column details to be created for field customizer.
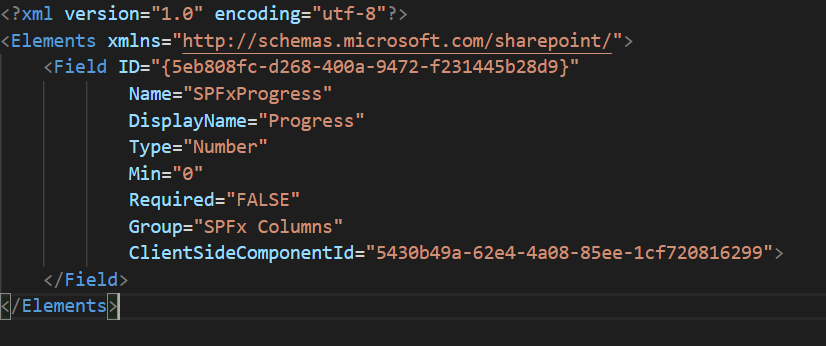
- Open the elements.xml file located at SharePoint → assets → elements.xml in the solution folder. The below image shows the default content of element.xml. Specify the details for the column. The field customizer will create a new site column as per the details provided in this file and will apply the customization to it.
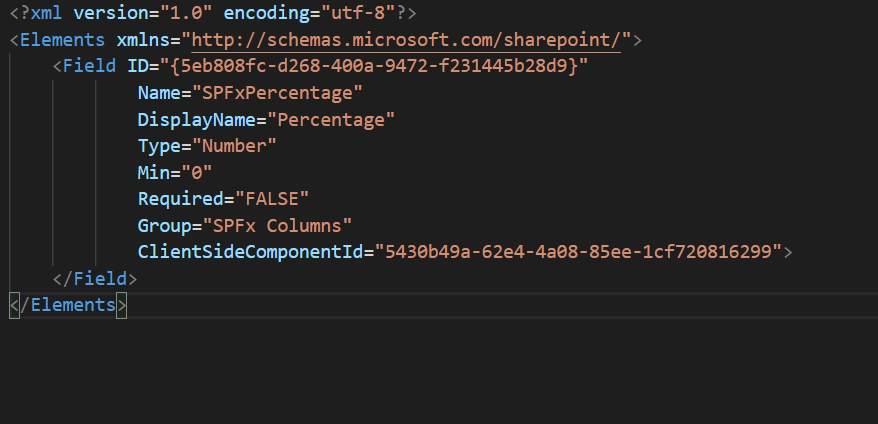
- The below image shows the updated element.xml file.
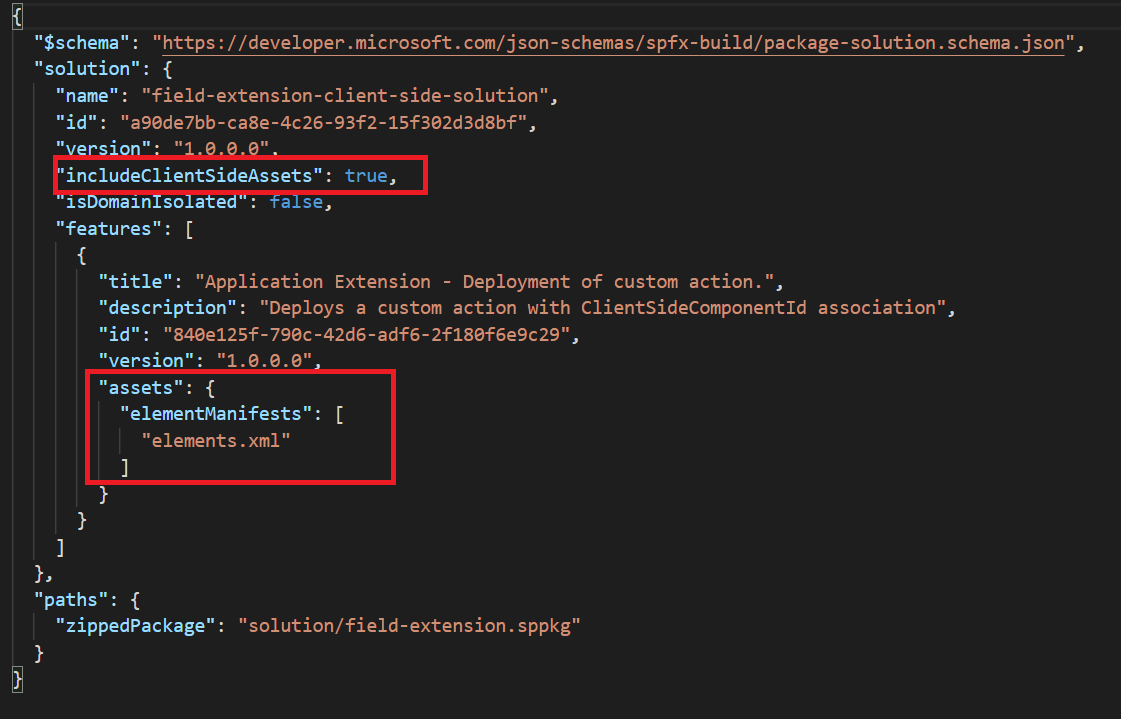
- Before deploying the solution, it is important to verify that the element.xml file is being taken into account in the package-solution.json file. Observe the below image, the element.xml is having an entry in “elementManifests.” Also, the “includeClientSideAssets” is set to true, which means the asset files will be included in the package file, and we don’t need to specify the CDN path for the asset files.
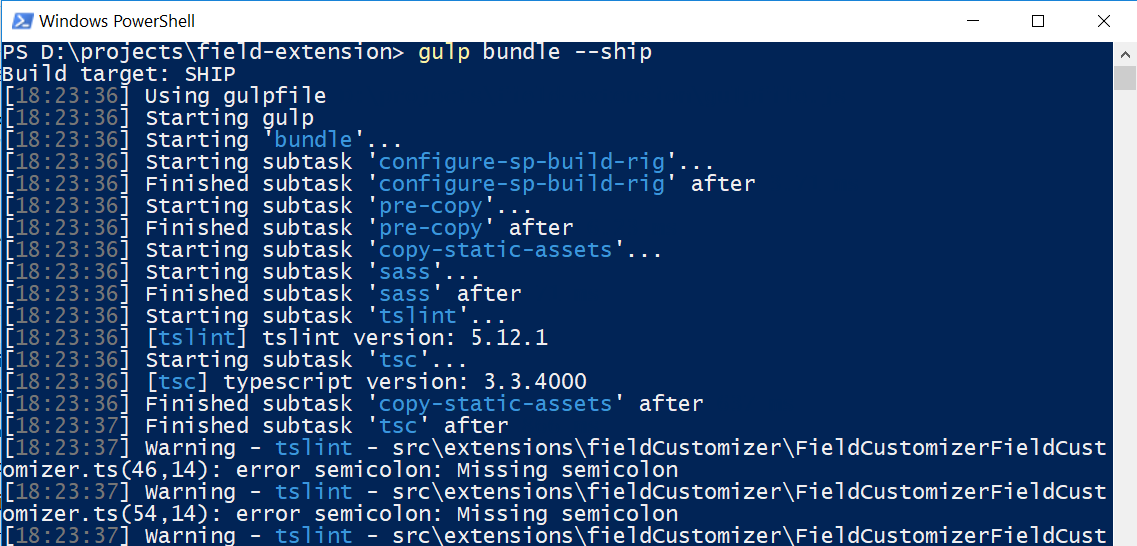
- Let’s create a solution package. From the console, execute the below command to create a structure for packaging.
- gulp bundle –ship
- gulp bundle –ship
- Run the below command to create a package file (.sppkg).
- gulp package-solution –ship

- gulp package-solution –ship
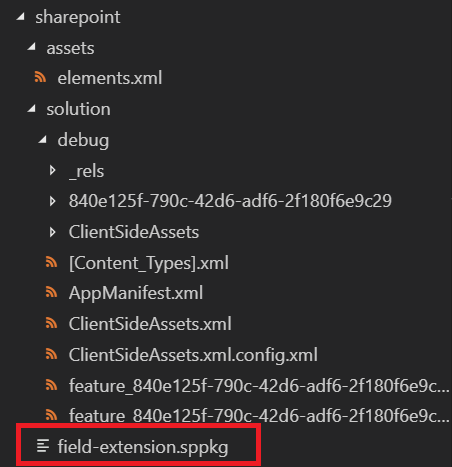
- In the solution, the above process has created a .sppkg file located at the SharePoint → solution. This folder also contains the assets and the debug scripts.
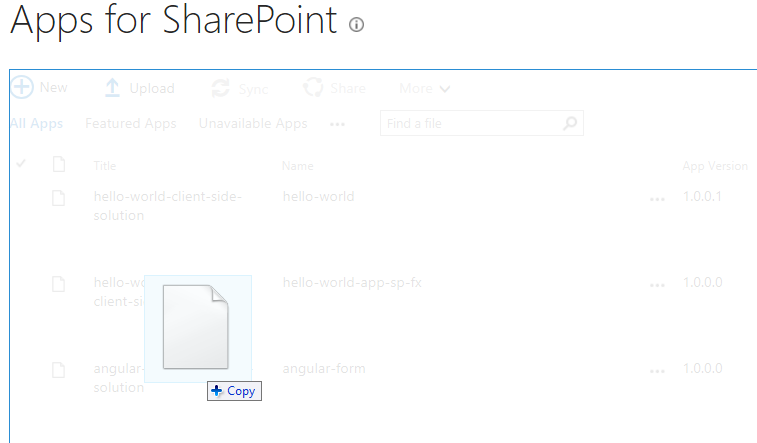
- To deploy the app, open the app catalog of the tenant and navigate to Apps for SharePoint library.
- Either upload or drag and drop the field-extension.sppkg file to Apps for SharePoint library inside App Catalog.
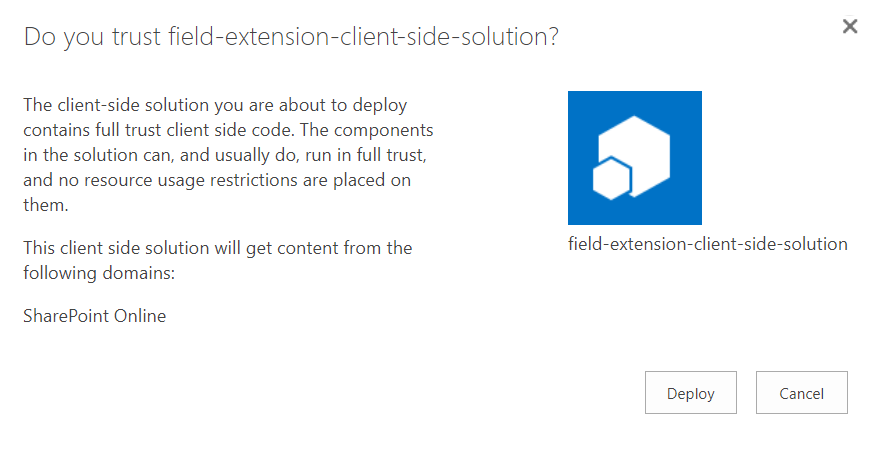
- To deploy the solution, a dialog will be displayed to trust the client-side solution by clicking on the Deploy button.
- Navigate to the site collection where the extension is deployed.
- From the top right corner of the site, click on the gear icon, and select “Add an app.”
- Now find the app by entering the name in the search box.
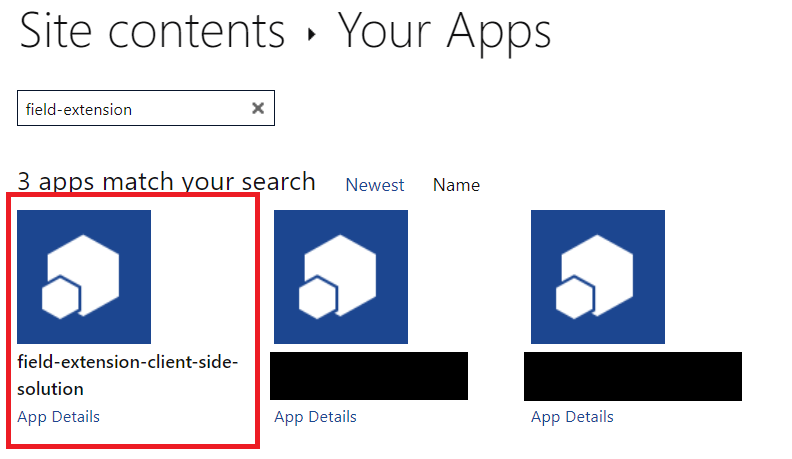
- Select the field-extension app to install it. Refresh the page when the installation is done.
- Once the application is installed successfully, it is displayed in the Site Contents.
- Now navigate to the List where the custom column of field customizer extension is to create.
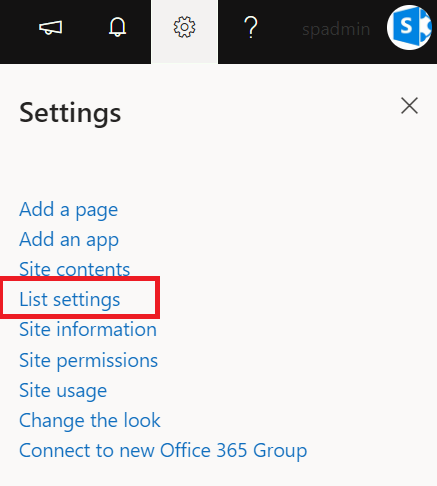
- Click on the gear icon at the top right corner and navigate to List Settings.
- Click on “Add from existing site columns” under the Columns section.
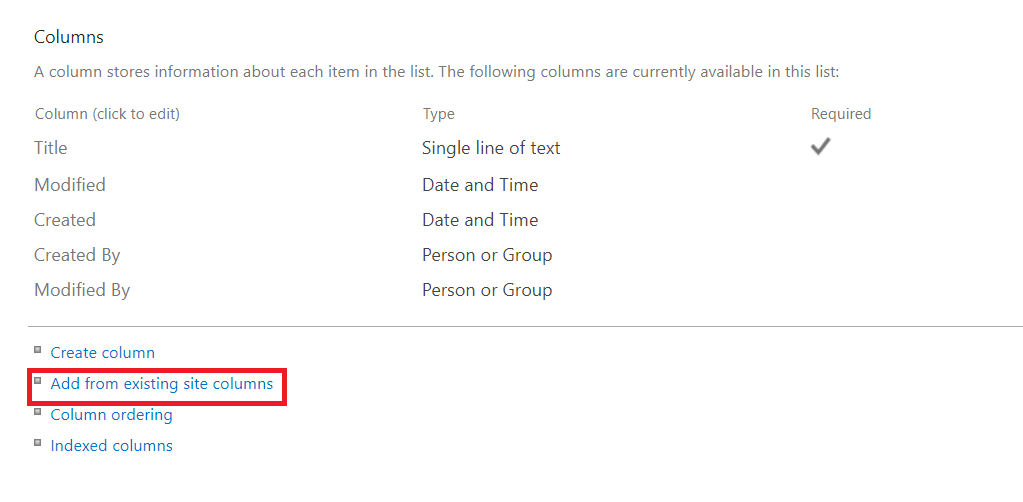
- Find a group name SPFx Columns in the “Select site columns from” dropdown. This group name is specified earlier in the element.xml file.
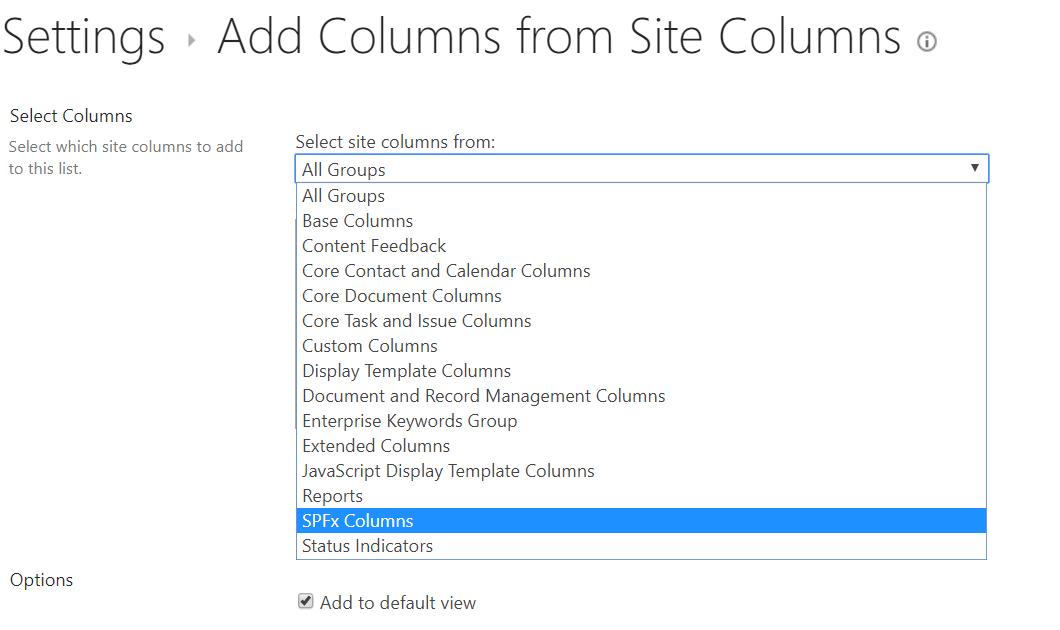
- Find and select the field name which has been specified in element.xml and put it on the right-hand side.
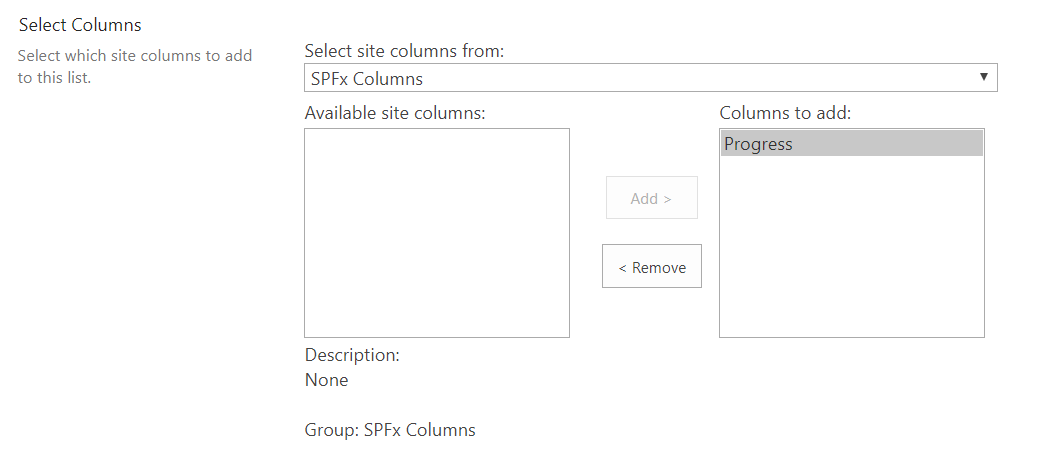
- The column is added to the List and will be visible in the default view. Let’s make some entries in the List.
- Once entries are inserted in the List, the custom formatting is rendered without the debug query parameters.
Conclusion
The SFP works like a charm in SharePoint Online to carry out any customization. The various components of the SPFx help SharePoint developers in the customization of the modern site. This blog is a part of our SharePoint Framework series, and it helps in customizing a column as per the requirement in the modern list/library. Stay tuned with sysgenpro- SharePoint development company, for our next blog related to List View Command Set.

Shital Patel
Shital Patel is VP at sysgenpro with a high-level of proficiency and technical precision in SharePoint Development. His experience of the last two decades has helped businesses to solve complex challenges resulting in growth and performance of Startups to Fortune 500 companies.
Subscribe to our Newsletter
Signup for our newsletter and join 2700+ global business executives and technology experts to receive handpicked industry insights and latest news
Build your Team
Want to Hire Skilled Developers?


Comments
Leave a message...